Throwing a Cylinder on the Wheel: 5 Exercises to Build Control
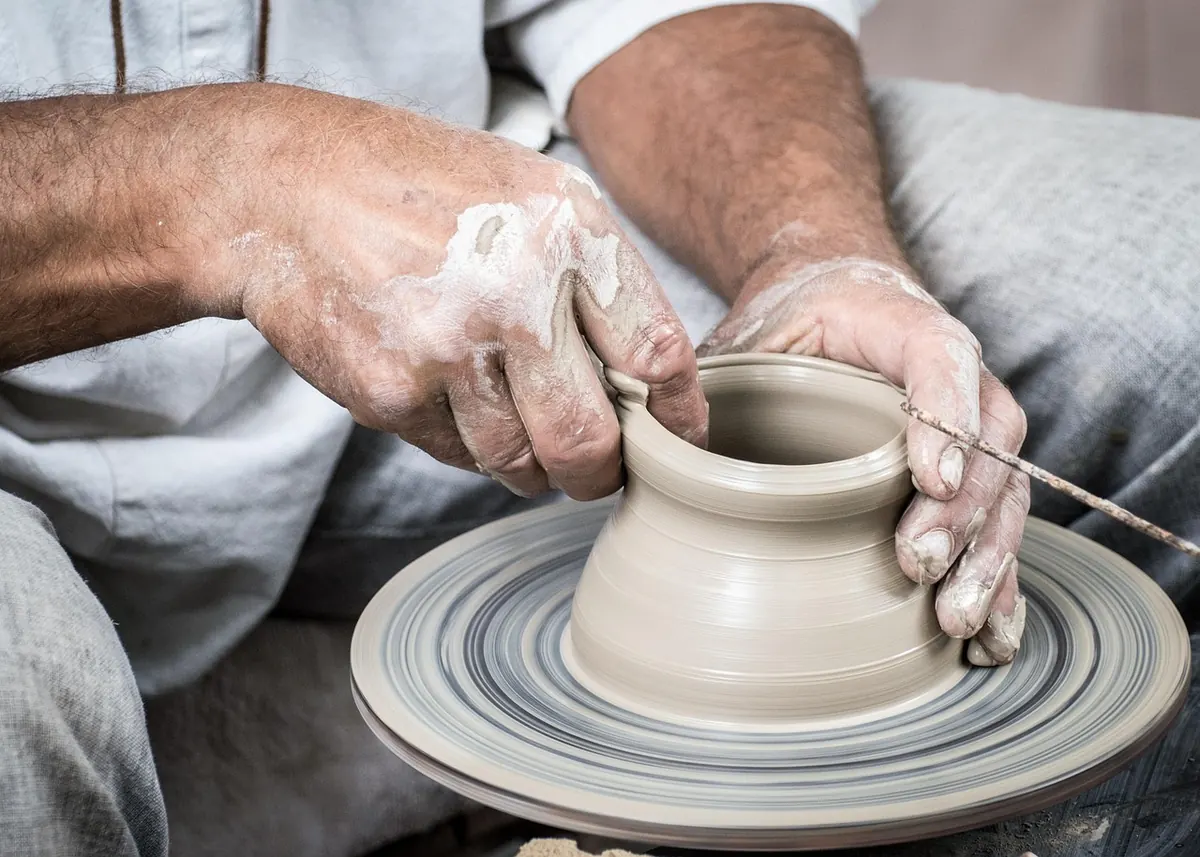
Throwing a cylinder is the first real test of wheel control. Mugs, pitchers, jars, and most vases begin as one, and a cylinder exposes every wobble in your pressure, water, and timing. It is also a diagnostic tool: because the form is simple, any lean, thick rim, or uneven floor is easy to see and hard to blame on the shape. The good news is that control is not a mystery. It comes from short, repeatable exercises with the same clay and the same weight, done until your hands know what even feels like. Set aside twenty minutes, wedge four or five balls of clay, and keep the wheel speed steady. Work at a pace where you can see the clay move rather than feel it blur. These five exercises are designed to be repeated, not perfected in one session.
Exercise 1: The Cut-and-Inspect Cylinder
Weigh out 500 g of clay and throw a simple cylinder about 12 cm tall. Center, open, set the floor, and pull the walls without fussing. Do not smooth the surface or fix the rim endlessly. When the cylinder is firm enough to hold its shape, run a thin wire down through the center and cut it in half. Look at the cross-section. Hold one half up to the light if that helps, and keep a notebook nearby so you can sketch the wall profile or write a quick note about what you see.
What to look for
- Wall thickness at the rim compared with the middle. A common habit is to leave a heavy rim and a thin middle. If the rim is much thicker, you may be stopping each pull before the clay has actually moved upward.
- Floor thickness. If the base is much thicker than the wall, the cylinder will feel bottom-heavy and can dry unevenly. A thick floor also makes mugs feel clumsy in the hand.
- The curve of the inside wall. A bulge or dip shows where your fingers pressed too hard. Small dips often appear just above the floor, where the inside finger hesitates.
- Any lean or S-curve. That usually starts at the base, not at the rim. Check whether the cylinder is centered at the bottom before you blame the final pull.
Repeat with three fresh balls. Keep the wheel speed the same. The goal is not a perfect cylinder; it is a clear picture of your habits. Once you can see the thick rim or thin middle, you can correct it on the next pull. If all three halves show the same problem, you have found a pattern worth working on. If each one is different, slow down and pay attention to your hand position before changing anything else.
Exercise 2: The Three-Pull Cylinder
After centering and opening a 1 kg ball, allow yourself only three pulls from the base to the rim. Count them out loud. Each pull should overlap the one before, start just above the floor, and finish with a compressed rim. Keep the wheel slow enough that you can see the clay move rather than feel it blur. If the clay ripples under your outside hand, you may be pulling too fast or using too much water. If the cylinder twists, check that your inside and outside hands are working at the same height.
Most potters use extra pulls to fix unevenness, but that often makes the wall thinner in one place and thicker in another. Three pulls force you to place your inside finger and outside hand with intention. If the cylinder collapses, cut it off, wedge the clay, and try a smaller ball. A shorter cylinder with even walls teaches more than a tall one rescued by ten pulls. You can also pause between pulls to compress the rim with your fingers or a chamois; that small pause is part of control, not a break from it.
A shorter cylinder with even walls teaches more than a tall one rescued by ten pulls.
Exercise 3: The Blind Height Test
Choose a target height, such as 15 cm, and throw a 1 kg cylinder without measuring it. Pull until your hands say you are at the target. Then stop the wheel and measure. Write down the actual height and what you felt. Repeat five times with fresh balls, keeping the clay weight and wheel speed the same. Add a short note about the rim, the wall, and whether the cylinder felt stable or soft at the end.
The point is calibration. You may discover that you consistently overshoot because you keep pulling after the rim is already firm, or that you undershoot because you stop when the wall feels thin. Neither is a failure. Over a few sessions, your sense of height becomes more reliable, and you need fewer glances at a ruler. If you use a wooden gauge, mark the target with a pencil and keep it at the edge of the wheel, but do not look at it until the pull is finished. You might find that your hands are accurate at 12 cm but lose confidence at 18 cm; that is useful information, not a verdict on your skill.
Exercise 4: The Coin-Floor Drill
Open a 1 kg ball to a floor that is roughly the thickness of a coin. Use a needle tool to check the center and the edges of the floor before you pull. Then pull the walls without adding thickness at the base. The first pull should begin just above the floor, not at the outer edge of a thick heel. Compress the floor with a rib before you start pulling; this helps firm the base and makes the transition from floor to wall easier to feel.
A heavy base feels stable at first, but it holds moisture, dries unevenly, and makes the cylinder look clunky. The coin-floor drill trains the transition between floor and wall. After pulling, cut the cylinder in half and compare the floor with the lower wall. If the base is still twice as thick as the wall, open the next ball a little deeper and pull from slightly lower. If the floor tears or feels thin, open a little less deep and compress the base more. This exercise is especially useful for mugs and small bowls, where a thick base is obvious in the hand.
Exercise 5: The No-Trim Pair
Throw two cylinders from the same weight of clay, aiming for the same height and diameter. Do not rely on trimming to fix the shape. Compress the rim with a chamois or your fingers, clean the base with a rib, and leave the walls alone. Let both cylinders stiffen to leather hard, then compare them side by side. Look at the profile, the rim, and the base before you pick them up; then hold each one to feel the weight and balance.
The pair will tell you whether your centering, opening, and pulling are repeatable. If one leans, check whether you stood in the same place. If one has a thick rim, check how you finished each pull. If one is wider, check how far you opened the floor. The goal is not identical production work; it is a steady hand. A pair that looks like siblings is a good sign that your control is improving.
Common Mistakes to Watch For
Most cylinder problems come from a few familiar habits. Before you add more exercises, check whether any of these are showing up in your cut halves or no-trim pairs.
- Pulling too wet. Excess water makes the wall soft and easy to stretch, but it also encourages collapsing and uneven thickness. Use just enough water to keep your hands sliding.
- Pulling too fast. A fast wheel can hide a wobble. Slow down until you can see the wall rise evenly under your fingers.
- Too many rescue pulls. Extra pulls often thin one section while leaving another thick. Set a pull limit and stick to it.
- A heavy rim. If you do not compress the rim at the end of each pull, clay gathers at the top and the cylinder feels top-heavy.
- A thick floor. Opening too shallowly leaves a base that holds moisture and throws off the balance of the finished pot.
- Standing off-center. If your body is not anchored in front of the wheel, your hands drift and the cylinder leans. Check your stance before you blame the clay.
Why Same Weight and Wheel Speed Matter
These exercises only work if you control the variables. Use the same clay body, the same weight, and roughly the same wheel speed each time. Otherwise, a cylinder that feels harder may simply be larger, wetter, or thrown on a faster wheel. Keep a small note on the wheel head or in a notebook: clay weight, target height, number of pulls, and one thing you noticed. That record turns practice into feedback. When you change one variable, change only one; for example, compare five 1 kg cylinders at the same speed before you try 800 g. The cylinder is honest about what your hands are doing, but only if the test is fair.
A Short Practice Plan
You do not need to run all five exercises in one sitting. Short, focused sessions work better. Try this sequence over a week:
- First session: throw three cut-and-inspect cylinders. Keep notes on wall thickness and floor thickness.
- Second session: throw five three-pull cylinders. Stop when your hands get tired.
- Third session: do the blind height test with five 1 kg balls.
- Fourth session: alternate coin-floor drills and no-trim pairs, two of each.
Keep the clay weight and wheel speed consistent. Save the cut halves until the end of the week and line them up; the change in wall thickness is easier to see than to feel. If a session goes badly, cut the cylinders off, wedge the clay, and make a smaller ball. Control grows from repetition, and the cylinder is honest about what your hands are doing. By the end of the week, you should have a clearer sense of your habits, a steadier pull, and a set of exercises you can return to whenever your cylinders start to drift.
Photo: LubosHouska / Pixabay

You Might Also Like
A practical field guide to finding, sampling, and testing wild clay along Italy’s coast, with safe collecting habits and simple tests for potters.
A practical costing checklist for small pottery studios, covering materials, kiln time, labor, overhead, and the wholesale and retail margins that turn a base cost into a fair shelf price.